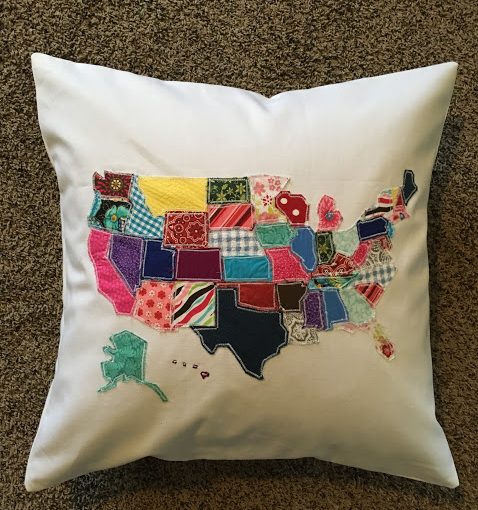
A few weeks ago, I saw the idea for a US map quilt that looked great, but also like a lot of work. I decided to make a throw-pillow size instead using fabric scraps. It turned out better than I expected, and matches almost any color scheme! Here’s how you can make one:
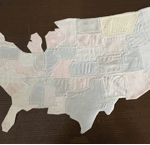
Start by printing your map template. Use this PDF, and click Print > Poster > Landscape > Tile Scale between 150% and 190% depending on how big you want your map. I printed it a few times and held it up to the pillow to see how big I wanted it.

Next, tape together your map into one big piece, then cut out each state. This map has somewhat simplified borders so it’s actually not that bad to cut each one. Make sure to put them in a plastic bag as you cut them out, or the little New England states might get lost.

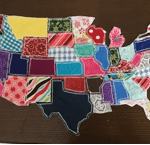
Once the paper states are all cut, pick your fabrics. I used 25 different patterns of scraps, so there were 2 states cut from each. Try to pick fabrics with basic patterns or solids, because the map starts to look pretty busy if there are lots of big shapes within each state.

To cut the fabric to the right shapes, tape the paper state to the fabric with scotch tape around the edges. Then cut right through the tape and fabric to the right shape. It is important to be pretty accurate with cutting at this part, so the states will match up later.

Once all the states are cut out, take a big piece or muslin or other lightweight material and lay the states out on top of it, using a regular-sized map as a reference.

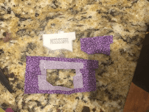
Pin the states down well. For smaller states like Rhode Island, I used some Elmer’s glue to hold it to the fabric, because a pin wouldn’t really fit without fraying.

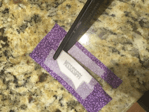
Now, it’s time to start sewing the states to the muslin. Try out some different zigzag widths and lengths on scrap fabric to see what you like. You’ll want it fairly thin in width and close together in length, kind of like a basic machine embroidering stitch. On my machine, I ended up liking a width of 3 and length of 0.5.

Carefully sew around each state, around 1/8” from the edge of the state, backstitching and cutting the threads after each one. I started with Washington and moved east, so that I could get used to sewing them with the bigger states before I got to the tiny ones.

When it comes to the super small states like Hawaii, Rhode Island, and Delaware, I just did one line of zigzag to tack the fabric down. Otherwise, if possible, I sewed around the edges of the state, because it looks nicer.

Once all the states are sewn on (except Hawaii and Alaska), cut the muslin right to the edges of the country. Press everything well, using some steam to make sure the whole thing is flat.

At this point you pretty much have one big applique with states on one side and muslin on the other.
Use a regular straight stitch around the edge of the country over the zigzags to attach the map to your pillowcase. (You can use an existing pillowcase or make one from this pattern. If you use the pattern in the link, sew the map on the fabric after you cut it and before you sew the pillow together, to make things simpler.)

Pin/glue and sew Alaska and Hawaii directly onto the pillowcase now the same way you sewed the states to the muslin.

Sew around one more state toward the middle of the map (I did Nebraska) with a straight stitch to secure the map to the pillowcase.

And you’re done! If you want, you can sew on a little button where you live, or on your favorite states. Hopefully everything makes sense- let me know if you have any questions!

Leave a Reply